Monday, September 27, 2010

My Dad's Iphone Birthday Cake


I had the most splendid day yesterday. The Kansas City Chiefs won against the 49ers (which meant Mr. Incredible was in a good mood), I gorged myself on my mom's home cooking, we celebrated my dad's 56th birthday with extended family and enjoyed a piece of the Iphone cake I made for his party. Family + Food = a great day. Can I interest you in some food pornography? 

 
On the menu...Lechon, which is delicious roasted pork. The best part is the crisp skin.

Pancit Canton (Noodles with chicken and vegetables)


Arroz Valenciano (stewed chicken and sticky rice)


Beef BBQ


Sweet and Sour Tilapia fillets

Sunday, September 19, 2010

Brazilian Cheese Bread (Pao De Queijo)


I first experienced these cheesy rolls at a place Mr. Incredible lovingly refers to as "Man Heaven", a restaurant called Chama Gaucha a Brazilian Steakhouse. Unlike a regular steakhouse, various cuts of meat are served in succession to each guest, individually, right at the table. The waiters walk around with their sword-like skewers and knives, and cut the meats off the skewers onto the guests' plates. It's the perfect place to OD on beef. All the meats were succulent and delicious, but it was these crispy, chewy, cheese rolls that stayed on my mind long after dinner was done.

What makes this bread unique is that it uses tapioca flour which is a grain free flour derived from the cassava root. It's what gives it that chewy satisfying texture. Tapioca flour, or manioc starch, can be found at most Asian markets. (If you're in the San Antonio area, you can find it at the Tabares Philippine Market. Hi Mom and Dad!). The type of cheese used in the traditional recipe is a mild farmer's cheese, but you can use a combination of cheeses. A mozzarella, feta and Parmesan cheese blend is delicious in this recipe.

Pao De Queijo (Brazilian Cheese Bread) adapted from this recipe.

2 cups tapioca flour or manioc starch
1 cup milk
1/4 cup olive oil
1 ts. salt
3/4 cup mozzarella cheese
3/4 cup feta cheese
1/4 cup parmesean cheese
2 eggs

Directions:

Preheat oven to 400 degrees. Mix flour and salt in a mixing bowl. In a saucepan heat milk and oil until boiling. Add hot liquid to the tapioca flour and mix on medium speed. Add cheeses and the eggs. Mix until thoroughly combined. Dough should be sticky. 


Drop by rounded tablespoons onto a parchment paper lined baking sheet.


Bake until golden brown. Best when eaten hot.


    Monday, September 6, 2010

    Mr. Incredible's Xbox 360 Birthday cakes (Halo Reach edition)


    Fondant used to hate me. I also used to hate fondant. I hated it so much that I swore never to work with it again. But it was Mr. Incredible's birthday today and I had been planning the perfect birthday cake for weeks. The problem was that I couldn't make it without ::gulp:: fondant. So I gave it another go only this time I used marshmallow fondant.

      
    It turned out much tastier and surprisingly easy to work with. I went with an Xbox shaped cake with two controllers. Mr. Incredible bought a limited edition Halo Reach Xbox 360 slim a few weeks back but it's not set to be released until September 14th. 


    I thought it would be cute to surprise him with a cake that looked like it.


    The cutting of the cake was a little painful to watch :o


    I made the Xbox out of two layers of carrot cake with white chocolate ganache filling.


    The controllers took a couple hours to complete because of all the little details (thanks to my cousins for their help), but it was still fun to make. 


    We ate one controller and saved the other.


    The cake was a chocolate guinness cake with chocolate ganache frosting.YUM.


    Happy Birthday Mr. Incredible!


    Marshmallow Fondant recipe by Wilton

    Ingredients:

    • 1 package (16 ounces) white mini marshmallows (use a good quality brand)
    • 2-5 tablespoons water
    • 2 pounds (about 8 cups) sifted confectioners' sugar
    • 1/2 cup solid vegetable shortening
    Makes: About 2 pounds marshmallow fondant.

    To make marshmallow fondant, place marshmallows and 2 tablespoons of water in a microwave-safe bowl. Microwave 30 seconds on high; stir until mixed well. Continue microwaving 30 seconds more; stir again. Continue until melted (about 2 1/2 minutes).

    Place 3/4 of the confectioners' sugar on top of the melted marshmallow mixture. Fold sugar into marshmallow mixture. Flavoring can be added at this point if desired. Place solid vegetable shortening in easily accessed bowl so you can reach into it with fingers as you are working. Grease hands and counter GENEROUSLY; turn marshmallow mixture onto counter. Start kneading like you would dough. Continue kneading, adding additional confectioners' sugar and re-greasing hands and counter so the fondant doesn't stick. If the marshmallow fondant is tearing easily, it is too dry; add water (about 1/2 tablespoon at a time) kneading until fondant forms a firm, smooth elastic ball that will stretch without tearing, about 8 minutes.

    It's best to allow Marshmallow Fondant to sit, double-wrapped, overnight. Prepare the fondant for storing by coating with a thin layer of solid vegetable shortening, wrap in plastic wrap and then place in resealable bag. Squeeze out as much air as possible. Marshmallow Fondant will keep well in refrigerator for several weeks.
    When not working with fondant, make sure to keep it covered with plastic wrap or in a bag to prevent it from drying out. When ready to use, knead fondant until smooth. Roll out fondant 1/8 in. thick.
    To color fondant: If you need to tint the entire batch of fondant, add a little icing color to the melted marshmallow mixture before adding confectioners' sugar. For smaller amounts of tinted fondant, add icing color to portions of fondant as needed.

    Friday, September 3, 2010

    Yeast Doughnuts with Raspberry Jam


    Remember when I was attacked by those mini doughnuts (here). This time I was attacked by my own craving. My craving for yeast doughnuts. The fried kind. The first time I made yeast doughnuts they came out chewy, dense, and sickeningly sweet. I was a bit frustrated because all that time and ingredients were wasted. It has taken me a year to build up the courage to give homemade yeast doughnuts another go. I used the same recipe, but did things a little differently than the first time. The first time I made these I added about a cup more flour than the recipe called for. The dough felt too sticky and soft. Please refrain yourself from doing this or you'll end up with dense, chewy icky doughnuts and no one wants their doughnuts to taste icky.

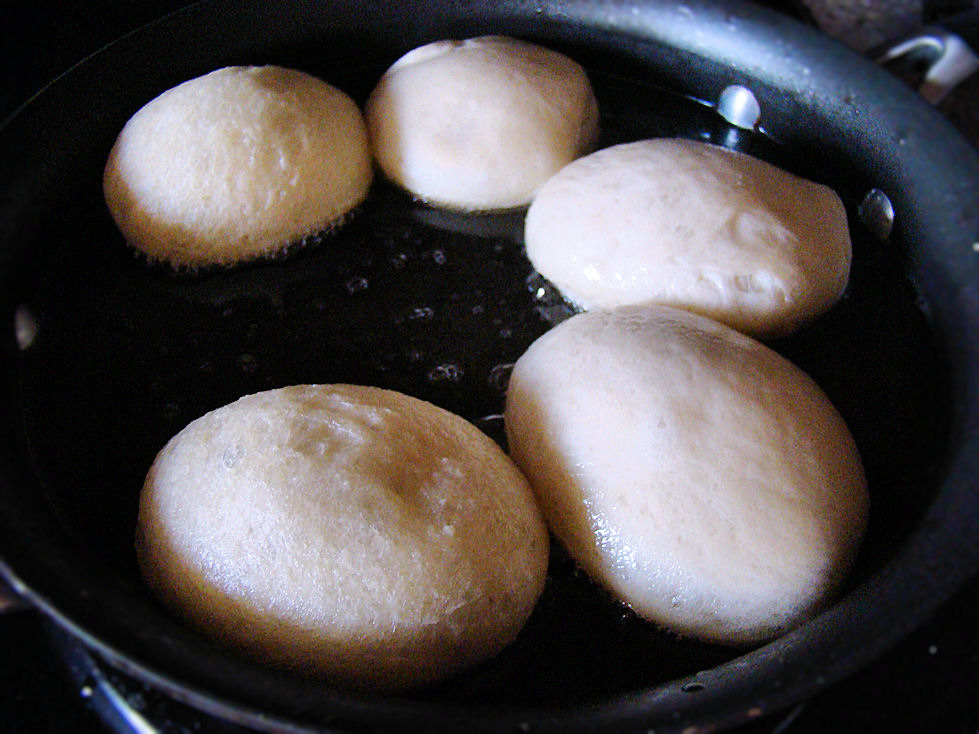
    I recommend  placing the doughnuts on 4 inch squares (depending on the size of your doughnuts) of wax paper to rise. This makes them easier to transfer into the hot oil without deflating them. Having your frying oil at the right temperature is also important. Not hot enough and these little guys suck up the oil and too hot will brown the outside too quickly and a will be a doughy mess on the inside.

    I filled these with raspberry jam and dusted them with powdered sugar. Yeast doughnut craving satisfied!


    Crispy and Creamy Doughnuts from Allrecipes.com

    2 (.25 ounce) envelopes active dry yeast
    1/4 cup warm water (105 to 115 degrees)
    1 1/2 cups lukewarm milk
    1/2 cup white sugar
    1 teaspoon salt
    2 eggs
    1/3 cup shortening
    5 cups all-purpose flour 1 quart vegetable oil for frying

    1/3 cup butter
    2 cups confectioners' sugar
    1 1/2 teaspoons vanilla
    4 tablespoons hot water or as needed

    Directions

    1. Sprinkle the yeast over the warm water, and let stand for 5 minutes, or until foamy.
    2. In a large bowl, mix together the yeast mixture, milk, sugar, salt, eggs, shortening, and 2 cups of the flour. Mix for a few minutes at low speed, or stirring with a wooden spoon. Beat in remaining flour 1/2 cup at a time, until the dough no longer sticks to the bowl. Knead for about 5 minutes, or until smooth and elastic. Place the dough into a greased bowl, and cover. Set in a warm place to rise until double. Dough is ready if you touch it, and the indention remains.
    3. Turn the dough out onto a floured surface, and gently roll out to 1/2 inch thickness. 


    Cut with a floured doughnut cutter. 


    Let doughnuts sit out to rise again until double. Cover loosely with a cloth.


    4. Melt butter in a saucepan over medium heat. Stir in confectioners' sugar and vanilla until smooth. Remove from heat, and stir in hot water one tablespoon at a time until the icing is somewhat thin, but not watery. Set aside.

    5. Heat oil in a deep-fryer or large heavy skillet to 350 degrees F (175 degrees C). 


    Slide doughnuts into the hot oil using a wide spatula. 


     Turn doughnuts over as they rise to the surface. Fry doughnuts on each side until golden brown. Remove from hot oil, to drain on a wire rack. 


    For filled doughnuts, take a pastry tip and bag filled with desired filling. Press the tip into the side of the doughnut and squeeze filling into it.  Dip doughnuts into the glaze while still hot, and set onto wire racks to drain off excess...


    or skip the glaze and dust with powered sugar.